
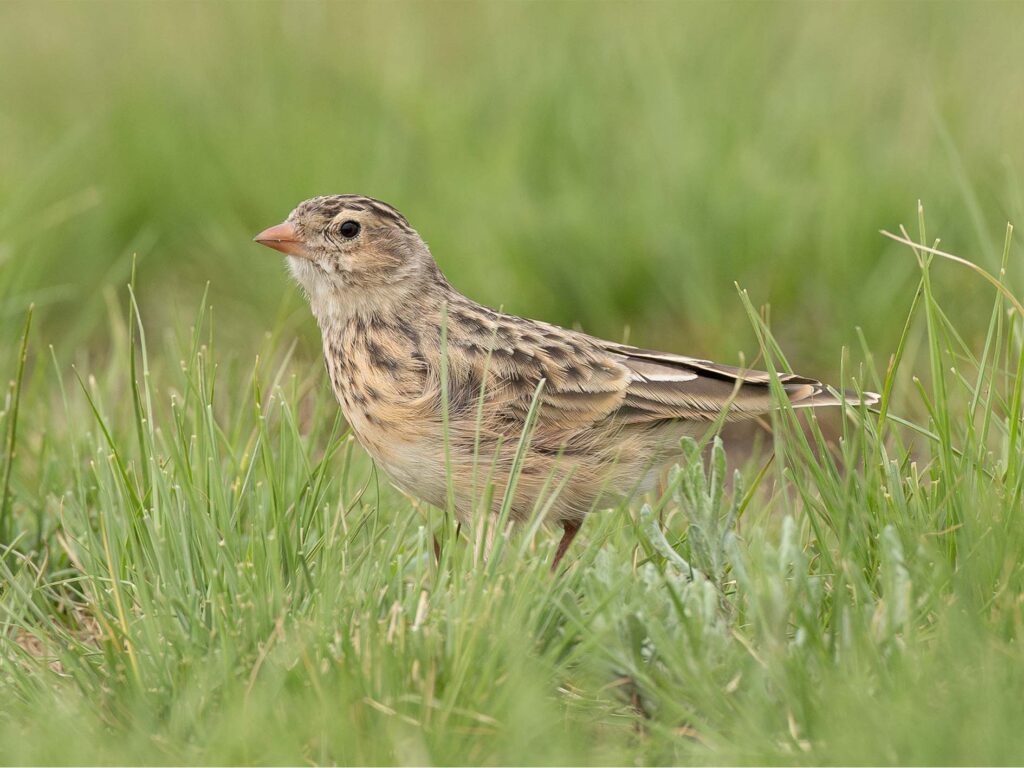
How to photograph birds without disturbing them
Bird photography is one of the most rewarding activities for wildlife enthusiasts in East Africa. You can capture a kingfisher diving into a river, a shoebill standing among papyrus reeds, a sunbird feeding on flowers or an eagle soaring above the savanna. However, getting a good photograph should never come at the expense of a bird’s safety or natural behaviour.
Birds are sensitive to disturbance, particularly when they are feeding, resting, nesting or caring for their young. Approaching too closely, making sudden movements, using flash or playing recorded bird calls can cause stress and interrupt important activities. Some birds may abandon a feeding area, while others may leave their nests when they feel threatened.
You can take excellent bird photographs without chasing animals or forcing them into view. The key is to use suitable equipment, understand bird behaviour, maintain a safe distance and allow the subject to behave naturally.
Whether you are photographing birds in Uganda’s wetlands, Kenya’s savannas, Tanzania’s national parks or Rwanda’s forests, the following techniques will help you improve your photography while respecting wildlife.
Keep a respectful distance
The most important rule in ethical bird photography is to maintain enough distance for birds to behave naturally. A bird should be able to feed, preen, rest, call or move around without constantly reacting to your presence.
Many beginners make the mistake of walking closer whenever a bird appears. Although this may produce a larger image in the camera, it can disturb the animal and cause it to fly away.
Instead, use a telephoto lens to photograph birds from a distance. A 300mm lens can be useful for larger or relatively approachable birds, while a 400mm, 500mm or 600mm lens provides more reach for smaller or distant species.
The appropriate distance depends on the bird, its behaviour, the habitat and the situation. A large stork in an open wetland may tolerate a different viewing distance from a small forest bird or a nesting raptor.
Watch the bird rather than concentrating only on your camera screen. If it stops feeding, repeatedly looks towards you, moves away, gives alarm calls or changes its posture, you may be too close. Increase your distance and allow it to settle.
There is no single safe distance that applies to every species. Follow park regulations and any minimum viewing distances established by local authorities or conservation organisations.
Use a telephoto lens instead of walking closer
A telephoto lens is one of the most useful pieces of equipment for ethical bird photography. It allows you to capture details without approaching the subject unnecessarily.
For beginners, a 70-300mm or 100-400mm lens can provide a practical starting point. These lenses are versatile enough for birds in gardens, wetlands, woodland and open landscapes.
More experienced photographers may prefer 150-600mm lenses or prime lenses around 500mm and 600mm. These provide additional reach for small birds and species that remain far from established paths.
A longer lens does not automatically produce better photographs. Image quality, autofocus performance, lens sharpness, camera handling and available light all influence the final result.
A 300mm lens can produce excellent images of a malachite kingfisher perched near a boat, while a 600mm lens may be more appropriate for photographing a distant shoebill without disturbing it.
Use your equipment to adapt to the bird’s natural distance. Do not treat the lens as a reason to keep approaching until you fill the frame.
Learn to recognise signs of disturbance
Birds communicate discomfort through changes in posture and behaviour. Learning to recognise these signals helps you decide when to stop photographing or move away.
A bird may become unusually alert, turn repeatedly towards you, stretch its neck, crouch, raise its feathers or stop feeding. Some species may give alarm calls or move deeper into vegetation.
Other birds respond by freezing. This can be misleading because the photographer may assume the animal is comfortable simply because it has not flown away.
A bird that freezes may be assessing a perceived threat. Do not interpret stillness as permission to approach closer.
If your presence causes a bird to change its normal activity, slowly increase your distance. Avoid sudden movements that could cause additional stress.
Pay particular attention to ground-nesting birds and species with chicks. Some parents may attempt to distract people away from their nests, while others may remain motionless to avoid drawing attention to their young.
The best photograph is one captured while the bird continues its normal behaviour.
Never chase birds to make them fly
Some photographers deliberately approach birds until they take off, hoping to capture dramatic flight photographs. This practice is known as flushing, and it can cause unnecessary disturbance.
When a bird is forced to fly, it uses energy that it may need for feeding, migration, escaping predators or caring for its young. Repeated disturbance can be particularly harmful in areas where birds have limited feeding opportunities.
Waterbirds are especially vulnerable when they are resting or feeding in wetlands. Chasing herons, egrets, ducks or waders into the air can interrupt feeding and cause entire groups to move away.
Instead of making birds fly, learn to photograph natural take-offs, landings and flight behaviour. Find a suitable observation point and wait for birds to move naturally.
For example, you can position yourself at a respectful distance from a wetland where pied kingfishers regularly hunt. With patience, you may photograph them hovering, diving and returning to their perches without approaching them.
Avoid photographing active nests from close range
Nesting birds require special care. Adults may become highly protective of their nests, and repeated human presence can interrupt incubation, feeding and protection of young.
Avoid approaching nests for close-up photographs. Even when an adult bird remains on the nest, your presence may cause stress or prevent it from leaving to find food.
Do not stand near a nest for extended periods waiting for the adult to return. Your presence may discourage the parent from approaching, leaving eggs or chicks exposed to weather and predators.
Never remove leaves, branches or surrounding vegetation to improve the composition. Natural cover protects eggs and chicks from predators, sunlight, wind and rain.
Do not touch nests, eggs or chicks. Avoid walking through vegetation where ground-nesting birds may be breeding, particularly when their nests are difficult to see.
If you accidentally discover a nest, leave the area calmly. Do not share its exact location publicly, especially if the species is rare or threatened.
For most recreational photographers, the safest approach is to avoid photographing active nests altogether. The welfare of the birds should take priority over obtaining a close photograph.
Avoid using flash, especially at night
Flash photography can disturb birds, particularly nocturnal species such as owls and nightjars. A sudden burst of bright light may interfere with their ability to see clearly in darkness and carry out normal activities.
Avoid direct flash when photographing birds at night. This is particularly important when observing owls hunting or nightjars resting on the ground.
Instead, use available light and adjust your camera settings. A wider aperture, suitable shutter speed and higher ISO can help you photograph birds in low-light conditions.
For example, a lens with an aperture of f/4 or f/2.8 can collect more light than a slower lens. You may also need to increase ISO to maintain a shutter speed that prevents motion blur.
During daytime photography, natural light is usually sufficient. If you use artificial lighting in a controlled environment, ensure it does not disturb the birds and follow the relevant wildlife photography guidelines.
Do not assume that a bird is unaffected simply because it does not fly away after a flash. Its behaviour may still be interrupted.
Do not use recorded calls to attract birds
Playing recorded bird calls can make some species appear closer, but it may also cause unnecessary disturbance.
Birds use calls to communicate with mates, defend territories, warn of danger and interact with their young. When they hear a recording, they may respond as though another bird has entered their territory.
A territorial bird may leave its feeding area to investigate or defend itself against the perceived intruder. During breeding periods, this can take adults away from eggs or chicks.
Repeated playback can also expose birds to stress, particularly when several photographers use recordings at the same location.
Instead of playing calls, learn to recognise natural vocalisations. Study the sounds of common species before your trip and listen carefully during field sessions.
If you are photographing a turaco in Kibale Forest or a secretive bird in Bwindi, patience and listening can help you locate the animal without disturbing it.
Some protected areas have specific restrictions on playback. Follow local rules and avoid using recordings to attract rare, threatened or nesting birds.
Use natural cover and established photography hides
Natural cover can help you photograph birds without becoming too conspicuous. Trees, shrubs and existing vegetation may provide partial concealment while allowing you to observe from a reasonable distance.
However, never break branches, cut vegetation or damage habitats to create a better position. Use existing paths and observation areas whenever possible.
Photography hides are particularly useful in wetlands, woodland and areas where birds regularly visit feeding or resting sites. A hide allows photographers to remain in one place while birds continue their normal activities.
Some birding destinations have established viewing platforms or hides overlooking waterbirds. These provide opportunities to photograph birds without walking directly into their feeding areas.
If you use a portable hide, set it up well away from nests and sensitive habitats. Do not place it so close that birds are forced to change their normal routes.
Remain quiet inside the hide and avoid repeated movements when birds approach. A hide is useful only when it reduces disturbance rather than encouraging photographers to get closer.
Stay on designated paths and avoid damaging habitats
Bird photography requires more than protecting the individual bird. You must also protect the habitat where it lives.
Walking through papyrus, reeds, grassland or forest undergrowth can damage vegetation and disturb hidden birds. You may also destroy nests or expose small animals to predators without realising it.
Wetlands are particularly sensitive because birds depend on shallow water, floating vegetation, reed beds and muddy feeding areas.
In Uganda, birdwatchers visiting Mabamba Bay should use authorised routes and follow their boat guide’s instructions. Moving into papyrus beds to obtain a closer photograph of a shoebill can disturb both the target bird and other wildlife.
In forest reserves such as Bwindi and Kibale, remain on authorised trails and avoid pushing through vegetation to photograph birds in the canopy.
In savanna parks, follow vehicle and walking regulations. Do not leave authorised routes simply to improve your camera angle.
Respecting habitat also improves photography. Established paths and observation points often provide good opportunities to photograph birds without creating unnecessary disturbance.
Avoid baiting birds for photographs
Baiting involves placing food or live prey to attract birds into a particular position. Some photographers use this technique to produce close-up images of raptors, owls and other species.
However, artificial feeding and baiting can change natural behaviour and create risks for wildlife.
Predatory birds may become dependent on predictable food sources or repeatedly visit areas where they face other dangers. Live bait can also expose prey animals to unnecessary suffering.
Avoid using insects, fish, mice or other animals to attract birds for photographs. Do not throw food into wetlands or place food near nests to encourage birds to approach.
If you photograph birds at a properly managed feeding station, check that it uses appropriate food and follows good hygiene practices. Feeding stations should not expose birds to predators, disease or unsafe feeding conditions.
Photographing birds as they forage naturally is a better long-term approach.
Be especially careful with nocturnal birds
Night photography presents additional challenges because many birds are active in darkness. Owls, nightjars and other nocturnal species may be sensitive to bright lights and repeated disturbance.
When searching for nightjars, avoid walking directly towards a bird resting on the ground. Their camouflage can make them difficult to see, and approaching too closely may cause them to fly away.
Use a guide who understands the species and knows how to observe it responsibly. Keep lighting to the minimum required for safe movement and identification.
Avoid shining a powerful spotlight directly into a bird’s eyes for extended periods. Do not use flash to obtain close-up photographs of owls or nightjars at night.
If a bird changes position, becomes alert or leaves its resting place, stop the photography session and give it space.
A photograph of a nocturnal bird resting naturally is more valuable than one obtained by repeatedly disturbing it.
Choose suitable camera settings for bird photography
Good camera technique can help you obtain sharp photographs without moving closer to the subject.
Birds move quickly, so shutter speed is important. The correct setting depends on the species, its movement and the amount of available light.
The following settings provide useful starting points:
| Photography situation | Suggested starting shutter speed |
|---|---|
| Perched bird | 1/1000 sec |
| Bird walking or feeding | 1/1000 to 1/1600 sec |
| Bird in flight | 1/2000 sec |
| Fast flight or diving | 1/2500 sec or faster |
Use a wide aperture where appropriate to allow more light into the camera. Many bird photographers work around f/4 to f/6.3, depending on their lens.
Set autofocus to continuous tracking so that the camera can follow a moving subject. Animal or bird eye-detection autofocus can also be useful when available.
Use burst mode when photographing natural flight or feeding behaviour. However, avoid taking unnecessary numbers of photographs if the camera shutter noise or your movements are disturbing the bird.
Increase ISO when light is limited rather than allowing the shutter speed to become too slow. A slightly grainy photograph is often preferable to a blurred image.
Image stabilisation can help when photographing stationary birds with a long lens. A monopod or tripod may also improve stability, particularly during extended observation sessions.
Use quiet camera equipment and controlled movements
Some cameras and lenses produce noticeable mechanical sounds. In quiet forest habitats, repeated shutter noise may attract the attention of birds or disturb animals resting nearby.
Where available, use an electronic shutter or a quiet shutter mode. Check your camera’s manual because electronic shutter settings can sometimes introduce rolling-shutter distortion when photographing fast-moving birds.
Avoid sudden movements when raising your camera. Prepare your settings before approaching an observation point so that you do not need to make repeated adjustments while a bird is nearby.
Secure camera straps, tripod components and other equipment to prevent them from knocking against one another.
If you are using a tripod, position it carefully and avoid repeatedly moving its legs across dry vegetation or hard surfaces.
A quiet photographer can remain in one position longer, giving birds more time to become comfortable with a stationary presence.
Photograph birds from a safari vehicle without disturbing them
Safari vehicles can provide useful opportunities for bird photography, particularly in open grasslands and wetlands. Birds may be accustomed to the presence of vehicles, although this does not mean they tolerate every approach.
Remain inside the vehicle where park rules require it. Do not ask your driver to move repeatedly towards a bird or block its path for a better photograph.
A pop-up roof can provide a stable position for photographing larger birds, such as ostriches, secretary birds, cranes and storks.
For smaller birds, use a suitable telephoto lens and avoid leaning too far outside the vehicle. Keep your equipment secure, especially when driving on uneven roads.
If a bird begins moving away because of the vehicle, ask the driver to stop or increase the distance. Do not pursue it.
A skilled safari guide can help position the vehicle at a suitable viewing distance and explain which areas are appropriate for photography.
Photograph birds in East Africa without disturbing them
East Africa offers exceptional bird photography opportunities, but each habitat requires a different approach.
Mabamba Bay in Uganda: This wetland is well known for shoebills, papyrus specialists and other waterbirds. Use an authorised boat operator, maintain a suitable distance and avoid entering reed beds. Photograph shoebills as they hunt or stand naturally rather than asking boat operators to approach too closely.
Kazinga Channel in Queen Elizabeth National Park: Boat trips provide opportunities to photograph pied kingfishers, malachite kingfishers, African fish eagles, herons, pelicans and other waterbirds. Remain seated or in the designated viewing position and follow the boat guide’s instructions.
Bwindi Impenetrable National Park: Forest bird photography requires patience because many species remain high in the canopy or move through dense vegetation. Use a telephoto lens, remain on authorised trails and avoid disturbing birds by playing recorded calls.
Kibale Forest: The forest supports turacos, hornbills, barbets, greenbuls and many other species. Listen carefully and wait for birds to appear naturally through the vegetation.
Maasai Mara in Kenya: Open grasslands provide opportunities to photograph secretary birds, vultures, eagles, rollers, bee-eaters and numerous smaller species. Use a safari vehicle responsibly and avoid driving off-road unless authorised.
Lake Nakuru in Kenya: The lake and surrounding habitats support flamingos, pelicans, cormorants, herons and other waterbirds. Maintain a suitable distance from feeding and nesting groups, particularly where birds gather in large numbers.
Serengeti in Tanzania: The open savanna supports a wide range of raptors, ground birds and migratory species. Use the vehicle as a viewing platform and avoid disturbing birds resting or feeding beside roads.
Akagera National Park in Rwanda: Wetlands, lakes, woodland and savanna provide opportunities to photograph storks, herons, fish eagles, kingfishers and other species. Follow park rules and use authorised observation areas.
Protect rare birds by controlling location sharing
Photographers often share their images on social media, birding platforms and photography websites. This can help people appreciate wildlife and learn about conservation.
However, publishing the exact location of a rare or vulnerable bird can attract unwanted attention. Some species are particularly vulnerable to disturbance, illegal collection or repeated visits by photographers.
Be especially cautious when sharing information about nesting birds, rare owls, threatened species and birds with very restricted distributions.
Consider removing GPS coordinates from photographs before publishing them. You can also use a general location rather than naming the exact tree, nest site or small wetland where the bird was found.
For example, describing a sighting as being in a particular national park may be more appropriate than sharing the precise location of a rare nesting bird.
Photographers should also consider the cumulative effect of many people visiting the same location. One visitor may cause little disturbance, but repeated visits by large groups can create significant pressure.
Work with responsible local bird guides
A knowledgeable local bird guide can improve your photography while helping you avoid unnecessary disturbance.
Experienced guides understand where different species feed, roost and nest. They can also explain which habitats require additional care and how to approach observation points responsibly.
In Uganda, a local bird guide can help you plan visits to Mabamba Bay, the Kazinga Channel, Kibale Forest, Bwindi and other important birding areas.
In Kenya and Tanzania, specialist guides can help identify suitable birding locations and explain park regulations affecting photography.
Before booking, ask whether the guide follows ethical birdwatching practices. They should not encourage chasing birds, disturbing nests, excessive playback or entering restricted areas.
A responsible guide will prioritise wildlife welfare and explain when a photograph is not worth pursuing.
Common bird photography mistakes to avoid
Some photography habits can cause unnecessary disturbance even when the photographer has good intentions.
Getting too close: Walking towards a bird for a larger photograph can cause stress. Use a longer lens and remain at a suitable distance.
Photographing active nests: Repeated visits can prevent adults from feeding or protecting their young. Avoid close nest photography.
Using flash at night: Bright flashes can interfere with nocturnal birds. Use available light and suitable camera settings.
Playing recorded calls: Playback can trigger territorial or defensive behaviour. Learn natural calls instead of using recordings to attract birds.
Chasing birds for flight shots: Forcing a bird to take off interrupts normal behaviour and wastes energy. Photograph natural movement from a suitable position.
Feeding or baiting birds: Artificial food sources can alter behaviour and expose birds to risks. Photograph natural feeding activities instead.
Leaving established paths: Walking through sensitive vegetation can damage habitats and disturb hidden nests. Follow authorised trails.
Sharing sensitive locations: Exact coordinates can attract crowds to vulnerable species. Use general location information where appropriate.
A practical checklist before photographing a bird
Before taking photographs, consider the following:
- Is the bird behaving normally?
- Am I far enough away to avoid changing its behaviour?
- Am I standing on an authorised path or observation point?
- Is the bird feeding, resting or caring for young?
- Am I using flash, playback or bait unnecessarily?
- Can I obtain the photograph with a longer lens instead of moving closer?
- Will sharing the exact location put the bird or its habitat at risk?
If you answer any of these questions in a way that suggests disturbance, change your position or stop photographing.
Making bird photography more responsible
Good bird photography requires patience, technical skill and respect for wildlife. A telephoto lens, suitable camera settings and careful observation can help you produce detailed images without approaching birds too closely.
The most important habit is learning when to stop. If a bird changes its behaviour because of your presence, increase your distance. If you discover a nest, leave it undisturbed. If a photograph requires bait, repeated playback or chasing, choose another opportunity.
East Africa offers outstanding locations for bird photography, from Uganda’s papyrus wetlands to Kenya’s open plains and Tanzania’s vast savannas. You can enjoy these opportunities while protecting the birds and habitats that make the region special.
A successful bird photograph should record a natural moment without forcing it to happen. When birds remain free to feed, fly, rest and raise their young without interference, both the wildlife and the photography experience benefit.



No comment