
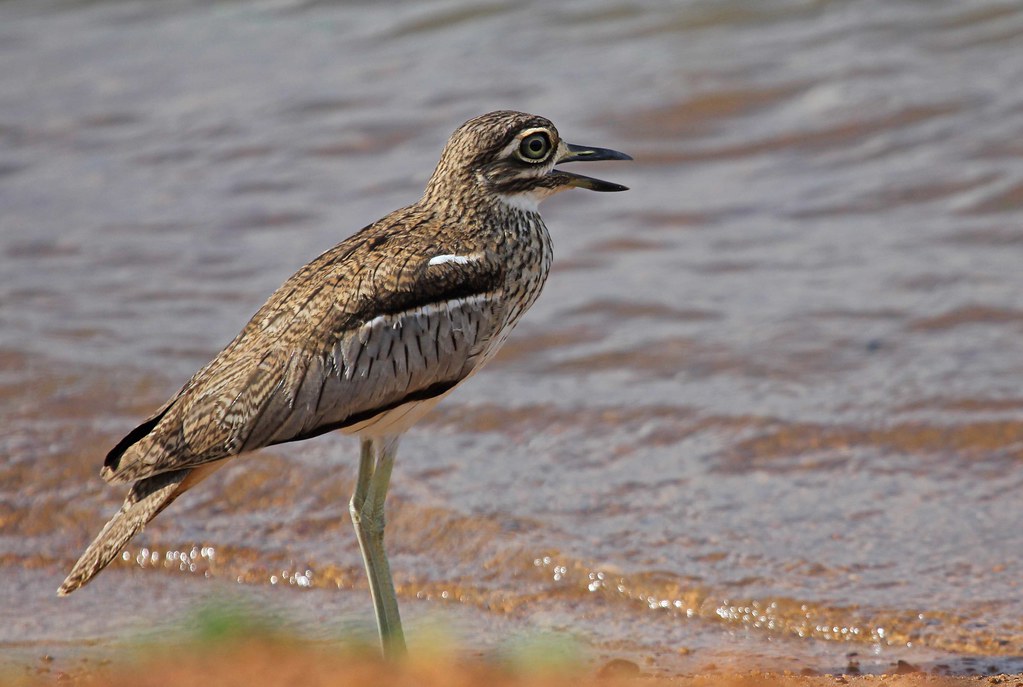
Beginner birding tips: How to stay quiet and find more species
Birdwatching is one of the most rewarding ways to experience East Africa’s natural environment. You can discover colourful sunbirds in a garden, watch kingfishers along a river, listen to turacos calling in a forest or observe eagles soaring above the savanna. However, finding birds is not always easy, especially when you are starting out.
Many beginners walk too quickly, talk loudly or spend most of their time looking at the wrong places. Birds often notice people before they are seen, and sudden movements can cause them to hide or fly away. Learning how to move quietly, listen carefully and observe different habitats can make a significant difference to the number of species you encounter.
You do not need expensive equipment or years of experience to become a better birdwatcher. A suitable pair of binoculars, a regional field guide, comfortable clothing and patience are enough to get started. The most important skill is learning to observe without disturbing the birds.
Whether you are birding in Uganda’s Mabamba wetlands, Kenya’s Maasai Mara, Tanzania’s Serengeti or Rwanda’s Nyungwe Forest, these practical techniques will help you find more species and enjoy your time outdoors.
Start your birdwatching early in the morning
Early morning is generally one of the best times for birdwatching. Many birds become active around sunrise, when temperatures are cooler and feeding activity increases. You may hear several species calling before you see them.
In East Africa, an early start is particularly useful in forests, wetlands and savanna habitats. Birds often feed actively during the first few hours of daylight before becoming less conspicuous during the warmer part of the day.
In Uganda, an early visit to Mabamba Bay can provide opportunities to search for shoebills, herons, egrets, jacanas and other wetland birds. In Kibale Forest, morning walks offer opportunities to hear turacos, barbets, hornbills and forest songbirds. In Queen Elizabeth National Park, early drives can reveal raptors, rollers, bee-eaters and other savanna species.
You do not need to arrive at every birding location before sunrise. However, starting around 6:00 or 6:30 am, depending on the location and season, can give you a useful advantage.
Late afternoon is another productive period. Birds may become active again as temperatures fall, particularly around water sources and feeding areas.
If you are visiting a national park with a birding guide, ask about the best departure time for the habitat you want to explore. Some wetlands, forests and specialised birding sites have different access arrangements.
Learn to walk quietly
One of the most important beginner birding skills is controlling how you move. Birds are sensitive to movement, especially when someone approaches directly or moves suddenly through their feeding area.
Walk slowly and avoid making unnecessary noise. Do not rush towards a bird as soon as you notice it. Instead, stop, observe its position and decide whether you can get a better view without disturbing it.
Pay attention to the ground beneath your feet. Dry leaves, loose stones and branches can make considerable noise, particularly in forest habitats. Where possible, place your feet carefully and avoid stepping on branches or disturbing vegetation.
Do not brush against shrubs or trees unnecessarily. Some birds feed close to the ground, and sudden movement through vegetation can send them into cover.
Your clothing can also affect how quietly you move. Loose equipment, jangling keys, metal accessories and camera straps can produce sounds that are unnecessary during birdwatching. Secure anything that may swing or make noise as you walk.
You should also avoid walking directly towards a bird for a closer photograph. A gradual approach from a reasonable distance is less likely to cause disturbance, although you should always retreat if the bird changes its behaviour because of your presence.
Stop frequently instead of walking continuously
Many beginners assume that covering more ground automatically leads to more bird sightings. In reality, walking continuously can cause you to miss birds that are feeding, calling or resting nearby.
A better approach is to walk for a short distance, stop and observe the surroundings. Spend several minutes scanning trees, shrubs, grassland and open spaces before moving again.
When you stop, remain quiet and avoid unnecessary movement. Birds that initially become silent or hide may resume normal activity once they no longer perceive an immediate disturbance.
For example, imagine walking along a forest trail in Bwindi Impenetrable National Park. You may hear a bird calling from the canopy but struggle to locate it. If you continue walking, you might move away before identifying the sound. Stopping gives you time to listen, locate movement and search the branches carefully.
The same technique works in wetlands. A bird may remain hidden among papyrus reeds, but patient observation can reveal it as it moves between feeding areas.
Try spending five to ten minutes at a promising observation point before continuing. You may discover more birds by observing one area carefully than by rushing through a long trail.
Listen before trying to see the bird
Your ears are among your most useful birdwatching tools. Many species are heard before they become visible, especially in dense forests and wetlands.
Bird calls can reveal the presence of species hidden behind leaves, tall grass or reeds. They can also help you understand where birds are feeding, communicating or moving.
Begin by listening to the general direction of a call. Is it coming from the ground, a nearby shrub, the middle of a tree or high in the canopy? Once you identify the direction, scan that area slowly for movement.
You do not need to identify every call immediately. Start by recognising common sounds and gradually build your knowledge.
For example, the repeated calls of a woodland kingfisher are different from the sharp sounds of a pied kingfisher hunting around water. Turacos often produce distinctive calls that carry through forest habitats, while many weavers and sunbirds produce shorter and more varied vocalisations.
Learn three or four common bird calls before each outing. You can use recordings from reputable bird identification resources to become familiar with them.
Avoid playing recorded calls repeatedly to attract birds. Playback can disturb territorial and breeding birds, and some protected areas restrict or prohibit its use. Learning calls through listening is more responsible than using recordings to force a bird into view.
Scan the habitat in different layers
Birds do not all use the same parts of a habitat. Some feed on the ground, others search through shrubs, while many spend most of their time in the canopy or flying above open spaces.
If you only look at treetops, you will miss birds feeding below. If you concentrate on the ground, you may overlook species perched on branches or soaring overhead.
Develop a systematic scanning routine.
Start at ground level. Look for birds walking through grass, searching for insects or feeding on fallen fruit. Then examine low shrubs and bushes, where small birds often forage.
Move your attention to tree trunks and branches. Woodpeckers, barbets, starlings and other birds may feed on bark, insects or fruit. Next, scan the middle and upper canopy for turacos, hornbills, pigeons and other tree-dwelling species.
Finally, look at the open sky. Eagles, vultures, kites, swallows and swifts may pass overhead without landing.
At wetlands, scan the water surface, muddy edges, floating vegetation, reed beds and distant shoreline. Different species occupy different sections of the same wetland.
This approach is particularly useful in East Africa because habitats often support a mixture of ground-feeding, tree-dwelling and aerial birds.
Watch for movement rather than searching only for colours
Birds can be difficult to see because many species have camouflage that blends into their surroundings. A brown bird may disappear against dry grass, while a green bird can be almost invisible among leaves.
Instead of searching only for bright colours, look for movement.
A slight movement in a bush may reveal a small bird feeding among leaves. A flicking tail can indicate a bird perched inside vegetation. A sudden movement across open ground may draw your attention to a wagtail, pipit or other ground-feeding species.
Look for changes in shape as well. A bird may be visible as a silhouette before its colours become clear.
This technique is especially useful for identifying shy and secretive species. Rails, crakes, warblers and other birds that spend time in dense vegetation may be detected through movement before their full appearance becomes visible.
When you notice movement, stop and focus on the area. Avoid rushing towards it. Give yourself time to determine whether the movement belongs to a bird, an insect or leaves responding to wind.
Use binoculars correctly
Binoculars make it easier to identify birds that are far away or hidden among vegetation. However, beginners often struggle because they lift their binoculars before locating the bird with their eyes.
The easiest method is to find the bird without binoculars first. Keep your eyes fixed on it, then raise the binoculars to your face without changing the direction of your gaze.
Once the bird appears in the field of view, adjust the focus slowly. Avoid moving the binoculars around too quickly, as this can make you lose the bird.
For general birdwatching, 8×42 binoculars are a practical choice. They provide useful magnification, a relatively wide field of view and good light gathering for early morning observations. An 8×32 pair can also work well if you prefer lighter equipment.
Do not assume that higher magnification is always better. Very powerful binoculars can be harder to hold steady and make it more difficult to locate fast-moving birds.
Practise focusing on common birds before travelling to a major birding destination. Start with pigeons, weavers, doves or other birds that regularly visit your garden or local park.
Wear clothing suitable for the habitat
Your clothing should allow you to move comfortably and quietly. Neutral colours such as brown, green, grey and khaki are practical for many birdwatching environments.
Bright clothing is not automatically a problem, but neutral colours can help reduce your visual presence in some habitats. Avoid clothing that rustles loudly when you move through vegetation.
Wear comfortable walking shoes with good grip. Forest trails can be slippery, while wetlands may have muddy sections and uneven ground.
A light hat can protect you from direct sunlight, and long trousers can provide protection when walking through grass or scrub. Insect repellent may also be useful, depending on the location and local conditions.
Carry only what you need. A heavy backpack can make walking uncomfortable and may produce unnecessary noise when equipment moves around.
For a short outing, binoculars, a field guide or identification application, a notebook, drinking water and a camera are usually sufficient.
Learn to recognise common birds first
One of the fastest ways to improve your birdwatching is to become familiar with common species. Beginners sometimes concentrate too much on finding rare birds while overlooking the species they encounter every day.
Start with birds that are easy to observe around your home, garden, hotel, school or local park. Learn their size, shape, colours, calls and feeding behaviour.
In East Africa, useful beginner species include village weavers, African pied wagtails, speckled pigeons, pied crows, common bulbuls, red-cheeked cordon-bleus and various sunbirds.
Once you recognise these birds confidently, it becomes easier to notice unfamiliar species.
For example, learning to identify a village weaver helps you compare it with other weavers that may have different facial markings, body colours and calls. Familiarity with common sunbirds also makes it easier to recognise less familiar species during a forest walk.
Do not worry about learning every species at once. Choose five to ten birds and focus on recognising them accurately before adding more.
Use a field guide or bird identification application
A regional field guide is an important companion for anyone learning to identify birds in East Africa. It helps you compare similar species and understand their distribution, habitat and appearance.
A useful choice is Birds of East Africa by Terry Stevenson and John Fanshawe. It covers Uganda, Kenya, Tanzania, Rwanda and Burundi, making it suitable for birdwatchers travelling across the region.
You can also use digital resources such as Merlin Bird ID and eBird. Merlin can assist with identification using photographs and sound recordings, while eBird provides checklists and records from birding locations.
Download any resources you need before entering remote areas where mobile internet access may be unreliable. Do not assume that every application feature will work offline.
Use identification suggestions carefully. An application may offer several possibilities, but you should compare the bird’s appearance, habitat, location and call before confirming the species.
If you are uncertain, record the bird as unidentified rather than making a guess. An accurate observation without a species name is more useful than an incorrect identification.
Learn to identify birds by shape and behaviour
Colour is useful, but it should not be your only identification feature. Lighting, shadows, age and seasonal plumage can change how a bird appears.
Start with the bird’s general shape. Is it small and round, long-legged, slender, heavy-bodied or compact? Examine its bill. A long curved bill may suggest a different feeding method from a short, strong bill.
Look at the legs and feet. Wading birds often have long legs, while many perching birds have feet adapted for gripping branches. Webbed feet are common among birds that spend much of their time swimming.
Observe how the bird moves. Does it hop, walk, climb, hover, glide or dive? These behaviours can help narrow down the possible identification.
Kingfishers provide a useful example. Pied kingfishers often hover above water before diving for fish. Malachite kingfishers usually hunt from a low perch, dropping quickly towards their prey. Their different hunting methods can help you distinguish them even before you examine their colours carefully.
Behaviour is particularly useful when a bird is partially hidden or too distant for detailed identification.
Search different habitats instead of staying in one place
Different habitats support different bird communities. If you want to find more species, explore a mixture of environments rather than spending every outing in the same type of landscape.
In East Africa, wetlands are excellent for waterbirds, including herons, egrets, storks, jacanas, kingfishers and various waders.
Woodlands and savannas support rollers, bee-eaters, hornbills, weavers, raptors and ground-feeding species. Forests provide opportunities to search for turacos, barbets, greenbuls, flycatchers and other specialised birds.
Mountain habitats can introduce you to highland species that may not occur in lower areas. Coastal forests also support specialised birds, some of which have very restricted distributions.
In Uganda, you could explore Mabamba Bay for wetland birds, Kibale Forest for forest species, Queen Elizabeth National Park for savanna and wetland birds, and Bwindi for Albertine Rift forest birds.
In Kenya, suitable destinations include Lake Nakuru, Arabuko-Sokoke Forest, the Maasai Mara and Samburu. In Tanzania, birdwatchers can explore the Serengeti, Lake Manyara, Tarangire and the Eastern Arc Mountains.
You do not need to visit every destination to become a better birder. Even a local wetland, woodland or garden can provide many opportunities to practise identification.
Avoid sudden movements when photographing birds
Photography can help you document unfamiliar species, but trying to get a close photograph can disturb birds.
Avoid running towards a bird, following it aggressively or moving through vegetation to improve your camera angle. If the bird begins moving away, give it space.
Use your camera’s zoom or a suitable telephoto lens rather than approaching too closely. A lens in the 300mm to 400mm range can be useful for many bird photography situations, although the best choice depends on your camera and the size of the bird.
Take photographs from established paths or authorised viewing areas. Avoid disturbing nests, roosting sites and feeding locations.
If a bird repeatedly gives alarm calls, freezes, changes its route or stops feeding after you approach, move away. These are possible signs that your presence is causing disturbance.
A good photograph should never take priority over the bird’s welfare.
Keep a birdwatching notebook
A notebook helps you remember what you saw and improves your identification skills over time.
Record the date, location, habitat and approximate time of each observation. Add a description of the bird’s size, shape, colours, call and behaviour.
For example, you might write: “Small blue and orange bird perched on a reed beside shallow water. Long pointed bill. Repeated short dives towards the water.”
Even if you do not know the species, these details may help you identify it later.
You can also record the weather and the conditions around the sighting. Strong wind, rain and bright sunlight may affect bird activity and visibility.
Review your notes after each outing. Compare your descriptions with a field guide or reliable birding resource. Over time, you will begin to recognise patterns and remember the features that distinguish similar species.
You can also maintain a personal species list. However, do not make the number of birds recorded the only measure of a successful outing. Learning to identify one unfamiliar bird correctly can be more valuable than adding several uncertain names to a list.
Birding mistakes beginners should avoid
Some habits make birdwatching less productive and can disturb wildlife.
Walking too quickly: You may pass birds without noticing them. Slow down and stop frequently to scan your surroundings.
Talking loudly: Conversation can make it difficult to hear calls and may cause nearby birds to move away. Keep your voice low, especially in forests and observation hides.
Looking only at large birds: Small birds often make up a significant part of the species diversity in a habitat. Examine shrubs, tree trunks, grass and reed beds.
Focusing only on colour: Similar species may have almost identical colours. Pay attention to size, bill shape, markings, behaviour and calls.
Chasing rare species: Beginners sometimes ignore common birds while searching for unusual sightings. Learn the common species first.
Using playback excessively: Repeated recordings can disturb birds, particularly territorial species and those caring for young. Avoid playback unless it is specifically permitted and used responsibly.
Approaching nests: Never move closer to a nest for a photograph or identification. Disturbance can expose eggs or chicks to predators and cause adult birds to abandon normal care.
Relying entirely on applications: Digital tools can make mistakes. Confirm unusual identifications with a reliable guide or experienced local birder.
A simple routine for your first birdwatching outing
You can practise these techniques during a one-hour visit to a local park, wetland or woodland.
Begin by arriving early and spending the first five minutes standing quietly. Listen for calls and observe movement before walking further.
During the next fifteen minutes, scan the habitat from the ground to the canopy. Look for common birds and take note of their shapes, colours and behaviour.
Spend another fifteen minutes observing one or two birds carefully. Use binoculars to examine their markings, but keep your movements slow.
Continue walking at a relaxed pace, stopping whenever you hear an unfamiliar call or notice movement. Record a few observations in your notebook.
During the final ten minutes, review what you have seen and identify any birds you could not name confidently. You can complete the identification at home using your field guide or digital resources.
Repeat the same outing at different times and on different days. You will gradually become familiar with the birds that use the area and notice seasonal changes.
Staying quiet and finding more birds in East Africa
Successful birdwatching depends on observation, patience and respect for wildlife. Moving slowly, listening carefully and learning to scan different parts of a habitat will help you find more species without disturbing them.
East Africa offers excellent opportunities for beginners. You can start with familiar garden birds, then explore wetlands, forests, mountains and savannas as your identification skills improve.
You do not need to identify every bird you encounter. Focus on learning a few species at a time, recording accurate observations and understanding the habitats where birds live. With regular practice, you will begin to notice calls, movements and small details that you previously overlooked.
The best birdwatching experiences often come from giving birds enough space to behave naturally. Stay quiet, remain observant and allow time for the wildlife around you to become visible.






No comment