
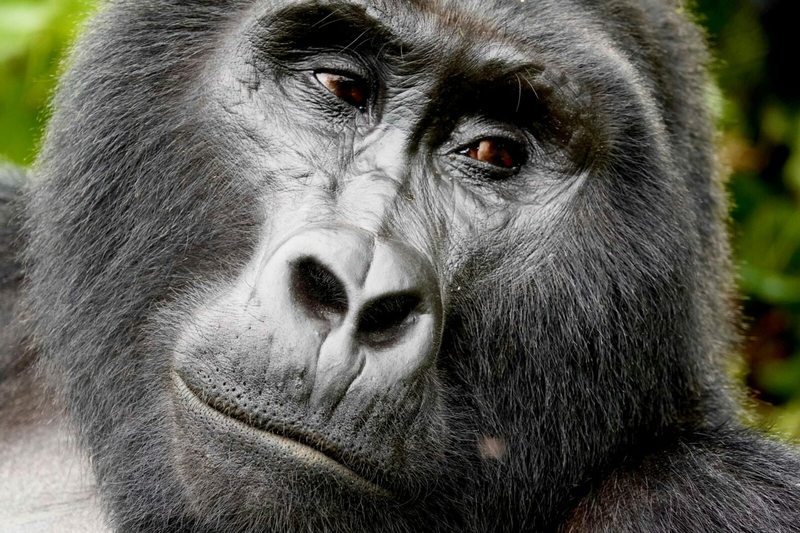
Camera Settings for Wildlife Photography in Bwindi Impenetrable National Park
Bwindi Impenetrable National Park, home to roughly half the world’s remaining mountain gorillas, presents photographers with one of Africa’s most rewarding but technically demanding wildlife photography settings. Dense montane rainforest, close-quarters encounters, and strict no-flash rules mean the camera settings that work well on an open savannah game drive simply don’t translate here, and understanding Bwindi’s specific conditions before your trek makes a measurable difference to your results.
Understanding Bwindi’s Uniquely Dim Light
Bwindi’s name, meaning “impenetrable,” reflects a genuinely dense forest canopy that blocks a large share of available light even at midday, and gorilla encounters often happen in the understory where light levels drop further still. Photographers arriving expecting savannah-bright conditions consistently find their default settings inadequate, so planning around consistently dim, dappled light from the outset is essential.
Aperture Choices for Close-Range Gorilla Portraits
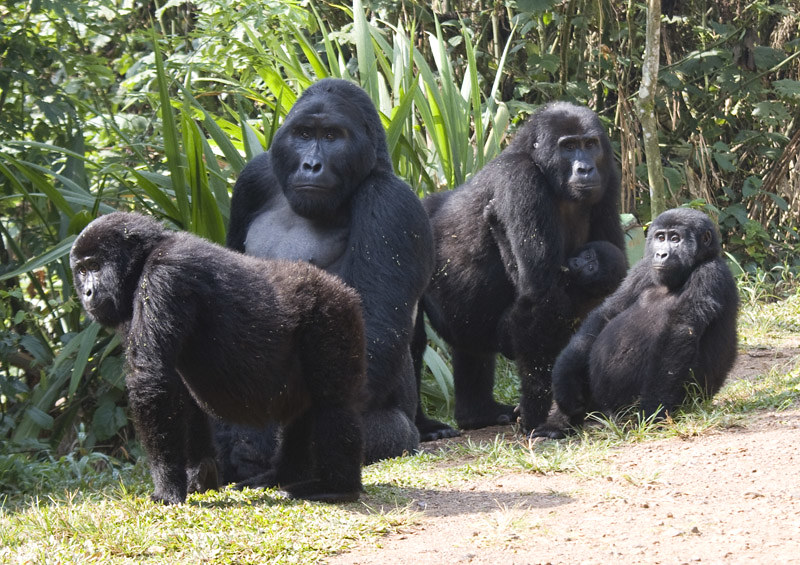
Since gorilla encounters in Bwindi often happen at remarkably close range, sometimes just a few meters, a moderately wide aperture around f/4 to f/5.6 typically balances enough light-gathering with sufficient depth of field to keep an entire gorilla’s face in focus. Going wider than this at extremely close range risks losing part of the face to shallow depth of field, a common and frustrating mistake among first-time gorilla photographers.
Shutter Speed for Gorillas at Rest and in Motion
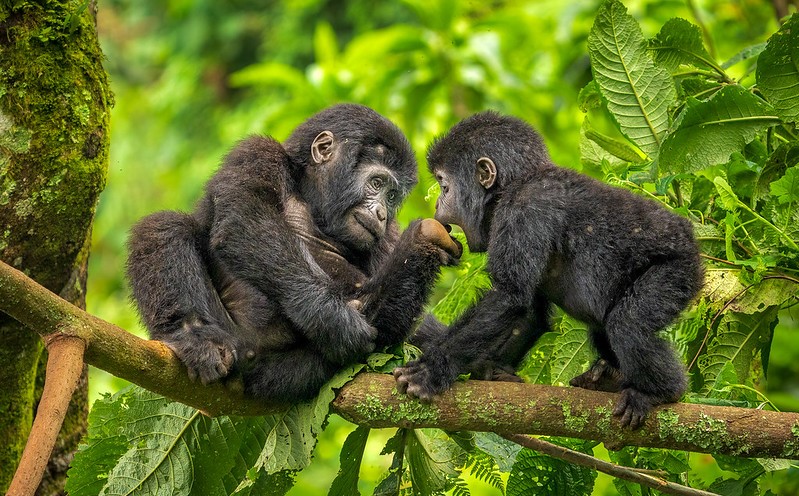
Gorillas spend considerable time resting, feeding, and grooming, allowing slower shutter speeds around 1/125s to 1/250s when your camera or lens has good stabilization, but young gorillas playing or a group shifting position demand 1/500s or faster to avoid motion blur. Keeping your camera in a mode that lets you quickly bump shutter speed when activity picks up serves Bwindi’s unpredictable pacing far better than a fixed manual setting.
Why High ISO Is Simply Necessary Here
Bwindi’s forest floor light regularly demands ISO settings between 1600 and 6400 to maintain both adequate shutter speed and usable aperture, and photographers who resist raising ISO out of habit consistently come away with blurred, unusable images. A sharp image with visible noise is virtually always more valuable than a soft, motion-blurred one, and modern camera sensors handle this ISO range far better than photographers often assume.
The No-Flash Rule and Why It Matters
Uganda Wildlife Authority regulations strictly prohibit flash photography around gorillas, both to avoid startling them and because flash is largely ineffective at typical trekking distances anyway, meaning every setting discussed here must work within natural light alone. This rule is non-negotiable and consistently enforced by ranger guides, so photographers should never plan around flash as a backup option.
Lens Choice for Bwindi’s Close-Quarters Encounters
Unlike open savannah photography, where long telephoto lenses dominate, Bwindi often rewards a shorter zoom in the 70-200mm range, since gorillas frequently sit close enough that a longer lens can’t even achieve focus. Many experienced Bwindi photographers carry two bodies or a quick-swap setup, one with a shorter zoom for close encounters and one with moderate telephoto reach for gorillas that keep their distance.
Autofocus Settings for Foliage-Heavy Framing
Continuous autofocus paired with a single or small-zone focus point, rather than wide-area autofocus, prevents your camera from locking onto the dense foreground vegetation that constantly frames gorilla encounters in Bwindi. Eye-detection autofocus, where available, performs surprisingly well on primates and is worth enabling specifically for this kind of close, foliage-obstructed shooting.
Composing Around Bwindi’s Cluttered Understory
A wide aperture that blurs Bwindi’s tangled foreground and background vegetation helps isolate your gorilla subject from what would otherwise be a visually chaotic frame, and shooting at the gorilla’s eye level rather than downward produces noticeably more compelling, connected-feeling images. Patience matters here too, since waiting for a clearer sightline through the vegetation often produces a far stronger shot than forcing a composition through cluttered foreground growth.
Shooting in RAW for Post-Processing Flexibility
Given Bwindi’s consistently challenging, high-ISO, low-light conditions, shooting in RAW format rather than JPEG provides considerably more flexibility to manage noise and recover shadow detail during editing. This matters more in Bwindi than in brighter environments, where the margin for correcting a slightly underexposed or noisy image in post-processing genuinely determines whether a shot is usable.
Weather-Proofing Your Gear for Rainforest Conditions
Bwindi’s rainforest environment brings genuine humidity and the ever-present possibility of sudden rain, and a rain cover or dry bag for your camera, along with silica gel packets to manage condensation, protects gear that would otherwise be vulnerable throughout a multi-hour trek. Lens cloths for wiping moisture are essential and should be carried in an easily accessible pocket rather than buried in a backpack.
Photographing Bwindi’s Other Primates and Birdlife
Beyond gorillas, Bwindi hosts chimpanzees, several monkey species, and over 350 recorded bird species, all of which reward the same low-light, fast-shutter approach used for gorilla photography. Birders in particular benefit from a longer telephoto reach than gorilla trekking typically requires, since forest birds are smaller in frame and often more distant than the park’s signature primates.
Managing Your Limited Time With Each Gorilla Group
Trekking permits allow a strict one-hour window with your assigned gorilla family, and arriving with your settings already configured for Bwindi’s typical conditions, rather than adjusting menus once gorillas are in view, preserves precious shooting time. Reviewing this article’s settings the night before your trek, rather than trying to recall them on the trail, meaningfully improves how much of that hour you spend actually photographing rather than fumbling with camera controls.
Battery and Memory Card Preparation
Continuous shooting in dim, high-ISO conditions drains batteries faster than typical daylight photography, and carrying a charged spare battery alongside at least one extra high-speed memory card protects against the genuine possibility of running out of capacity during your one-hour gorilla encounter. This preparation matters more in Bwindi than almost anywhere else, given how irreplaceable that single hour with the gorillas actually is.
Camera Body Considerations for Bwindi’s Conditions
A camera body with strong high-ISO noise performance and reliable low-light autofocus matters considerably more in Bwindi than in brighter safari environments, since you’ll spend the entire trekking window shooting at settings that would be unusual elsewhere. Modern mirrorless bodies with in-body stabilization offer a genuine advantage here, letting you shoot at slightly slower shutter speeds handheld without sacrificing sharpness during calmer gorilla moments.
Working With Rather Than Against Bwindi’s Green Palette
Bwindi’s dense forest produces an almost overwhelming saturation of green tones, and rather than fighting this in post-processing, many photographers find embracing it, allowing the deep greens to frame and contextualize the gorillas within their genuine habitat, produces more authentic, compelling images than attempting to neutralize the color cast entirely. Slight adjustments to white balance during editing can fine-tune this without eliminating the forest’s distinctive character.
Timing Your Trek for the Best Available Light
Morning treks, while starting in Bwindi’s coolest, dimmest conditions, often locate gorilla groups before the day’s activity increases, giving photographers a genuine trade-off between slightly better light later in the morning and potentially calmer, more settled gorilla behavior earlier on. Discussing this trade-off with your ranger guide, who understands the specific gorilla family’s typical patterns, can help set realistic expectations for your particular trekking day.
Photographing the Trek Itself, Not Just the Gorillas
Bwindi’s forest trails themselves offer worthwhile photographic subjects beyond the gorillas, from dramatic shafts of light breaking through the canopy to the porters and rangers who make the trek possible, and building in time for these secondary images creates a more complete visual story of your Bwindi experience. A slightly wider lens carried alongside your primary telephoto setup accommodates this kind of environmental storytelling.
Learning From Your Own Post-Trek Review
Reviewing your images critically after each trek, noting which settings produced your sharpest, best-exposed shots under Bwindi’s specific conditions that day, helps refine your approach for any subsequent gorilla encounters during a longer Uganda itinerary. Photographers who treat their first trek as a learning experience for a second, better-prepared encounter often see meaningful improvement in their results.
Bringing It All Together for Your Trek
Bwindi’s combination of dim light, close range, and strict trekking time limits genuinely rewards photographers who arrive with their approach already worked out rather than improvising once gorillas are in view. Treat this article’s settings as a starting baseline, adjust based on the specific conditions your ranger reports on trekking morning, and prioritize sharp, well-composed images over technically perfect but overly cautious ones.
Why Bwindi Ranks Among Africa’s Most Demanding Photography Destinations
Between the dense canopy light, close-quarters framing, strict no-flash policy, and a single one-hour window with your assigned gorilla family, few African wildlife photography settings demand as much technical preparation as Bwindi does. Photographers who treat it with this level of seriousness, rather than assuming general safari experience will transfer directly, consistently come away with the strongest, most memorable images.
Planning Your Bwindi Photography Trek
Bwindi rewards photographers who prepare specifically for its dim light and close-range encounters rather than relying on settings built for open savannah. All in Africa Safaris can arrange your Bwindi gorilla trekking permit and timing around the best available light, or you can get in touch to plan the details of your trip.

No comment